I knew that I would have to make new handles for it. That was simple enough. I bought a piece of red oak from Lowes and traced the old handles to it. After a quick cut with the jig saw we had rough handles. I used a roundover bit on the router t smooth the sides and sanded them down. A coat of "early American" Minwax and two coats of varnish later and they were ready.
Cleaning up the cast iron and steel was a bit more complicated. At first I was thinking of using the dremel to clean it, but that seemed too tedious. I remembered a YouTube video I had seen of a man cleaning a cast iron pan using electrolysis. Here's the video if interested. http://www.youtube.com/watch?v=0XlsNucmbiE. The basic steps follow:
- Fill a bucket with water, adding one tablespoon of Arm and Hammer WASHING (not baking) soda per gallon.
- Find some sacrificial steel. I used rebar pieces.
- Place them around the edges of the bucket and connect together with wire.
- Hang the part to be cleaned in the middle, making sure they don't touch.
- Hook a battery charger up to it, positive to the sacrificial steel negative to the part being cleaned.
- Go inside and come back tomorrow. I say go inside because this should not be done inside. What you are doing is turning the part being cleaned into the cathode which gives off Hydrogen and your sacrificial steel becomes the anode giving off oxygen during the electrolysis process. Also, no smoking during the process, think Hindenburg
- Brush off the residue with a wire brush and repaint.

Hindenburg
Unfortunately I didn't take any pictures of the process, but here is the final result.

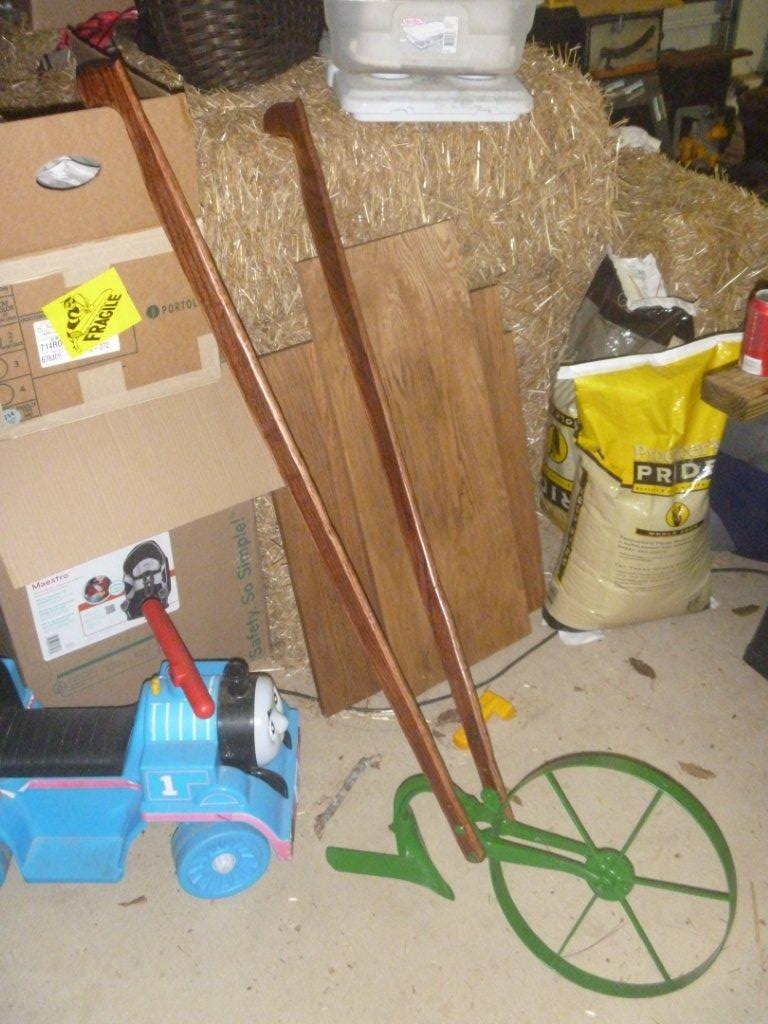
While I was in the process of cleaning it up I found a few markings on it. Most of the parts just had numbers but the moldboard (not pictured) had Planet Jr. stamped in the steel. After doing some research online I found out that it is a Planet Jr. No. 19 Garden Plow and Cultivator. If anyone is looking for info on old Planet Jr. Equipment I found a 1922 catalog online on archive.org. Here's the link http://archive.org/details/cu31924084885676.

This is the description from the 1922 catalog:
No. 19. This attractive implement is especially designed for the farmer's garden work, though it offers to every one with either field or garden a cheap and effective tool for wheel-hoe operations. The standard is slotted for depth regulation and an adjustable piece carries any of the attachments that go with the machine- The cultivating tooth does deep work and marks out rows for onion sets, plants, etc. The sweep is fine for level shallow work. The five-prong cultivator attachment is bolted directly to the frame, first removing the S-37 standard. The plow marks out furrows, covers them, and plows to or from the crop as wanted; opens furrows for fertilizer, peas, beans, etc. Use the five-prong attachment for both deep and shallow cultivation. It will break up the ground and leave a mulch so necessary to reserve the moisture in the soil. The variety, shape and quality of the tools make the implement light running and effective. It is strong, well made, and quickly adjusted. The height of the handles can be changed to suit man or woman, boy or girl.
No comments:
Post a Comment